Pimples are common and everyone has them at one point in their lives, so it’s completely normal to have a few zits or acne scars here and there. But it’s also normal to feel insecure about them.
If you want to remove pimples from a photo of yourself or you are being requested to remove acne and other minor skin issues from an image, you can definitely do so with Photoshop.
Whether you need to make your skin look flawless for social media or edit many yearbook photos, it’s completely possible with simple and basic photo editing skills you can learn in minutes.
In this article, we’ll help you learn how to clear pimples in Photoshop using three quick methods for small areas, a more in-depth method for larger areas, and an innovative photo editor you need to try.
How to Clear Pimples in Photoshop: Three Simple and Quick Methods for Small Areas
For the purpose of removing pimples in Photoshop, we will be using the software’s texture replacement tools, which include the following:
-
Patch Tool
-
The Spot Healing Brush Tool
-
Healing Tool
Each of these tools have the ability to remove pimples, acne scars, blemishes, but also freckles, wrinkles, and other minor skin issues. For these methods, however, they’re only best used for small areas, such as pimples on the cheeks, chin, or forehead.
If you want to clear out the entire skin on the face, you will need a different method, which we will discuss later on in the article.
Patch Tool
The Patch Tool is one of the most used and most helpful features of Photoshop utilized by photo editors. It offers an easy way to remove any unwanted objects in an image, such as pimples, acne, and other small spots on the skin of a subject.
Here are the steps to using the Patch Tool to remove pimples in Photoshop:
Step 1: Open your image.


In cases where you make an editing mistake or you don’t like the outcome, you still have the original photo without any of the edits you made.
Step 3: Go to the left-hand side menu and click the “Patch Tool.”

Step 4: Look for “Patch” on the upper toolbar menu and click “Normal.”
Step 5: Choose the pimples you want to remove from the image and start selecting with the Patch Tool.

When selecting, hold down the shift key and watch as the cursor changes from an arrow to a + sign. This will keep your patch in place as you continue selecting more pimples on the face.
Step 6: Once you’ve selected a good number of pimples, move the selections to the right or left to replace these areas with a clearer texture.

Repeat the process until you’ve completely cleared all the pimples on the image.
This is how the image will look after using the Patch Tool to remove pimples from the photo.
In summary, these are the steps to using the Patch Tool to clear pimples in Photoshop:
Open image > Make a duplicate layer > Click on Patch Tool > Click Normal > Select pimples > Move the cursor to the right or left > Repeat process
If you want to see a more detailed video of this tutorial, watch this YouTube video:
Photoshop Tutorial - Quickly Remove Blemishes and Pimples
The Spot Healing Brush Tool
The Spot Healing Brush Tool is considered to be the best tool for clearing out pimples in a photo. It is the default healing tool in Photoshop, with the ability to replace an unwanted area with a good texture.
What it does is it instantly samples the surrounding areas around the pimple, and with the use of the Brush tool, retouches the problem area by blending shading, luminosity, and texture.
This tool is perfect for anyone who’s never used Photoshop before as it’s a simple, quick, and effective resource for fixing minor issues in an image.
Here are the steps to removing pimples on an image using Photoshop:
Step 1: Upload your image.
Step 2: Duplicate a layer (please refer to the Patch Tool tutorial to see instructions)

Step 3: Click on “Spot Healing Brush Tool” located on the left-hand menu.

Step 4: Use the Spot Healing Brush Tool to brush over the pimples on the image. You will need to brush over the pimples or pimple areas one by one.

Step 5: Continue brushing over the pimples until you get your desired results.

In summary, here are the steps to clearing pimples in Photoshop using the Spot Healing Brush Tool:
Open image > Make a duplicate > Spot Healing Brush Tool > Brush over areas
For a more detailed tutorial on using the Spot Healing Brush Tool to remove pimples in Photoshop, please watch this YouTube video.
Remove Pimples with Spot Healing Tools
Healing Tool
The next we’ll be using is the Healing Tool. It’s another texture replacement tool in Photoshop that does the same thing as the Spot Healing Brush Tool, but there’s a minor difference.
The Healing Tool requires you to choose a reference point in the surrounding area of the pimple. Photoshop will then use this reference point to replace the area you want to fix.
Whereas when using the Spot Healing Brush Tool, you won’t need to do this, as it automatically analyzes the surrounding areas and uses the data to correct the spot you brushed over.
The Healing Tool takes more time and manual steps but the upside is that you have more control over how you want your image to look.
Here are the steps to using the Healing Tool to remove pimples:
Step 1: Upload your image.

Step 2: Duplicate a layer (please refer to the Patch Tool tutorial to see instructions).

Step 3: Click on the “Healing Brush Tool” located on the left-hand menu.

Step 4: Choose a reference point within the photo.


This is how it should look like when using the Healing Brush Tool to clear pimples on your photo.
In summary, this is how to use the Healing Brush Tool to clear pimples in Photoshop:
Open image > Duplicate a layer > Click on Healing Brush Tool > Choose a reference point > Brush over the pimples one by one
If you want to see more details about removing pimples using the Healing Brush Tool, please take a look at this YouTube Video.
Remove Pimples with Spot Healing Tools
These three methods are the simplest and quickest ways to clear pimples in Photoshop. They are ideal for small areas, or if you only want to fix a specific area on the face and not work on making the image more enhanced or higher in quality.
If you want a more detailed and thorough removal of pimples to achieve a clearer, blemish-free, and flawless appearance, the following tutorial will help you achieve it.
How to Remove Acne in Photoshop Using the Frequency Separation Technique
In the following tutorial, the image used features acne scars and not pimples, per se. But you can apply this method to remove pimples, acne, scars, or wrinkles to achieve a smoother skin appearance on the photo you’re editing.
The Frequency Separation Technique allows you to work on the texture of the image without affecting the color. By working on different layers at a time, you can smoothen out pimples, wrinkles, scars, and blemishes on an image without ruining the color and tone of your photo.
This technique allows for more controlled precision, providing you with skin retouching abilities with the end result being a smoother texture without color disruptions on your image.
Here are the steps to removing pimples, acne, wrinkles, and scars using the Frequency Separation Technique:
Step 1: Upload an image.

Step 2: Make a duplicate layer (refer to the Patch Tool tutorial to see instructions).


Step 4: Under the Layers panel, click on “Kind” and choose “Vivid Light” in the drop-down menu.

Step 5: Click on “Image” found on the upper toolbar, followed by “Adjustments,” and click on “Invert,” in the drop-down menu.

Step 6: Click on “Filter,” followed by “Other,” and click on “High Pass.”

Step 7: Customize the High Pass setting to 30.3 Pixels then click “OK.”

Step 8: Click on “Filter” on the upper toolbar, then “Blur,” and choose “Gaussian Blur.”

Step 9: Adjust the Gaussian Blur to 5 pixels and click “OK.”

Step 10: Go to the Layers panel and invert Mask to Black.

Step 11: Click on the “Brush” tool on the left-hand side menu.

Step 12: Start brushing over the problem areas on the image.

Step 13: Once you’ve completely brushed over the problem areas, combine all layers by clicking “Ctrl + Alt + Shift + E” on your keyboard.

Step 14: Finish your edits by further fixing problem areas with the Spot Healing Brush Tool.

Do the final touches with the Spot Healing Brush Tool and that’s it.
In summary, here are the steps to removing skin issues in an image and achieving a clearer and smoother complexion using Photoshop:
Open image > Duplicate Layer > Convert to Smart Object > Layers, Vivid Light > Image, Adjustments, Invert > Filter, High Pass > Adjust to 30.3 pixels > Filter, Blue, Gaussian Blur > Adjust to 5 pixels > Layers, Invert Mask to Black > Brush Tool > Brush over acne > Merge Layers > Spot Healing Brush Tool
As you can see, this technique is longer, more complicated, and requires you to change and adjust a number of settings.
However, if you need to learn more precise skin retouching skills in Photoshop, this technique is one of the most basic methods you can use to clear pimples from an image.
If you want to see more details of this tutorial, please click this YouTube video.
How to Fix Acne Scars or Wrinkles Fast
Photoshop is a fantastic tool to edit photos, whether you need it for personal use, for editing e-commerce images, or if you’re a professional photographer or graphic designer.
However, if you’re not familiar with the software, it requires you to sit down and dedicate a significant amount of time to fully learn the tools, features, and techniques used to edit images.
If your goal is to simply clear pimples on your photo for social media, to remove blemishes from a model’s picture, or you’re a professional who wants to remove pimples from a photo fast, we recommend a simpler option, and it’s the use of an AI photo editor called Imagewith.ai.
The Ultimate Beginner’s Tool for Removing Pimples in a Picture: Imagewith.ai Clearoff
Imagewith.ai is a revolutionary AI photo editor that makes photo editing so much easier and faster for both beginners and professionals.
Leveraging advanced machine learning algorithms, experience the ultimate way to manipulate any image with just a few simple clicks. There’s no need to learn any complicated jargon, or technicalities, adjust settings, or make duplicate copies.
With Imagewith.ai, you can learn how to clear pimples in seconds, giving your images a smooth, blemish-free appearance without complicated steps and procedures. Experience effortless, fast, and simple photo editing with professional results.
Imagewith.ai’s Clearoff Feature
Imagewith.ai offers powerful features you can use to enhance your photos, remove unwanted objects like pimples and acne, as well as remove backgrounds with a few simple clicks.
For removing pimples on an image, you can use Imagewith.ai’s Clearoff feature, created specifically for removing unwanted objects on a picture. With just one tap or a few brush strokes over blemish areas, you get to achieve a smoother image in seconds.
Experience the following benefits when using Imagewith.ai’s Clearoff tool:
- Superior Image Retention
Removing pimples from a photo with Clearoff will not affect the quality of the image. The original sharpness and clarity of the photo are preserved, ensuring you get superior visual quality with each edit.
- Streamlined Editing Workflow
Removing pimples becomes fast and easy. Simply upload your image, remove the blemishes, and that’s it. This saves you time and effort, helping you streamline your workflow.
- AI-Powered Precision
Advanced AI algorithms provide precise object removal, generating accurate, clean, and refined object removal ability.
Here are the steps to clearing pimples on an image using Imagewith.ai’s Clearoff feature:
Step 1: Open Imagewith.ai.

Step 2: Click on the “Get Started” button below the Clearoff section.

Step 3: Upload an image.

Step 4: You can use “Tap” to automatically remove pimples. Click on the area of the image you want to edit.

Click on “Draw” and customize the size of your “Brush.”
Brush over the pimples you want to remove. Once you let go of the cursor, Imagewith.ai will automatically analyze the brushed-over area, and use AI algorithms to remove pimples and make adjustments to the texture and color of the affected spots.
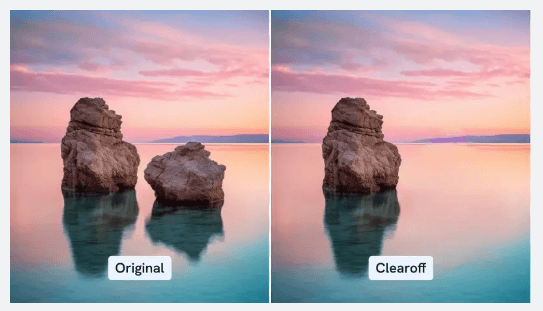
This is how the image will look after applying the Cleafoff feature to remove pimples from this photo. If you want to remove more blemishes or pimples, continue using the Clearoff feature.
For more improvements and enhancements on the image, use Imagewith.ai’s Overscale feature to fix issues on the image and improve its overall quality.

Photoshop is equipped with several tools to clear pimples on an image. From simple healing tools to more complicated techniques, the most popular photo editing software in the world is the most-used resource for both amateurs and professional editors alike.
While you can create a smoother, clearer complexion on a photo, learning how to clear pimples in Photoshop is not the most straightforward method you can find. For starters, you need to learn all the technicalities involved in the software so it can deliver great results.
Removing pimples can be done in Photoshop even if you have no prior editing experience, but it’s not for everyone.
That is why a better alternative is Imagewith.ai, an innovative AI photo editor that offers three simple features that cover comprehensive photo editing abilities.
Without the need to learn overwhelming steps to remove pimples and acne on images, you get to experience AI-powered precision unmatched by other photo editing software.
From uploading your image to clicking one to two buttons, get to enjoy great quality, accurate, and precise pimple removal with Imagewith.ai’s Clearoff feature.
Pimples are normal but can sometimes be an inconvenience especially when you need to have a good photo for social media, business, or for work.
Whether you’ve never edited a photo in your life before, or you’re a professional editor, you can take advantage of Imagewith.ai’s Clearoff feature, and create a blemish-free, smooth, and clearer image in seconds.


