Skin blemishes such as acne are normal to find in photos. Whether you are a professional photographer or not, your job is to ensure that the photos come out as clearly as possible and without any skin issues.
Luckily, Adobe Photoshop is a good tool that will help you even out your skin to give it a smooth look. You can also decide to do a smooth skin filter Photoshop download, but it may turn out looking unrealistic. The good thing about Adobe is that you don't have to be an expert in photo editing. You just need a few clicks, and you are good to go.
There are different ways to smooth out the skin using Photoshop, which include applying blur and using the frequency separation technique.
To avoid affecting other parts of the photo, such as the hair, you can use the spot healing brush. Achieving a smooth skin Photoshop online is quite easy these days since you only need to follow a few steps.
Here is a post and a step-by-step guide on how to make skin smooth in Photoshop and achieve realistic results.
Using the Spot Healing Brush - How to Smooth Skin in Photoshop 2023
The spot-healing brush is one of the easiest methods when it comes to removing small blemishes from the skin in a photo. You only need to select the tool; select the blemish and Voila! It's gone.
The tool also ensures that you do not alter other parts of the face, which may make it look unrealistic. Here's a step-by-step tutorial on how to use this tool;
Step One: Make a Copy of Your Image
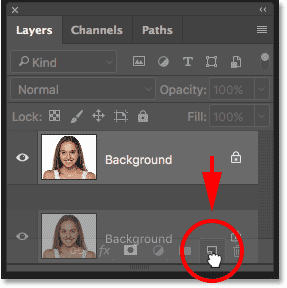
Start by opening the image in Photoshop, and it will appear as a background on the layers panel. To duplicate the original image, you need to press and hold the Alt key or option on Mac. Then click on the original image or background layer and drag it down to the New Layer icon at the bottom.
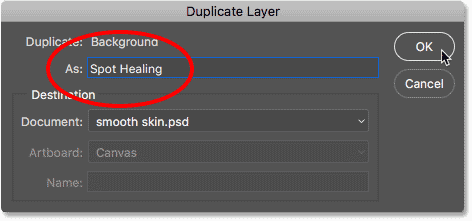
On the dialogue box of the duplicated layer, you can name this layer as 'spot healing' and then click OK.
A copy of the original image will appear just above the original one. It will have the ' spot healing' label on it. The spot-it blemish removal process will now be on this duplicate image.
Step Two: Zoom In
To return to normal, you can click on command 0 or command-.
Step Three: Choose the Spot Healing Brush
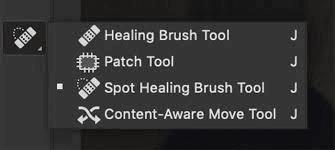
Now, you can start your spot-clearing process by selecting the spot-healing brush. The tool is located on the right side of the screen or the toolbar. Note that there is the healing brush tool and the spot healing brush.
Make sure you are using the spot healing brush.
Step Four: Customize the Tool

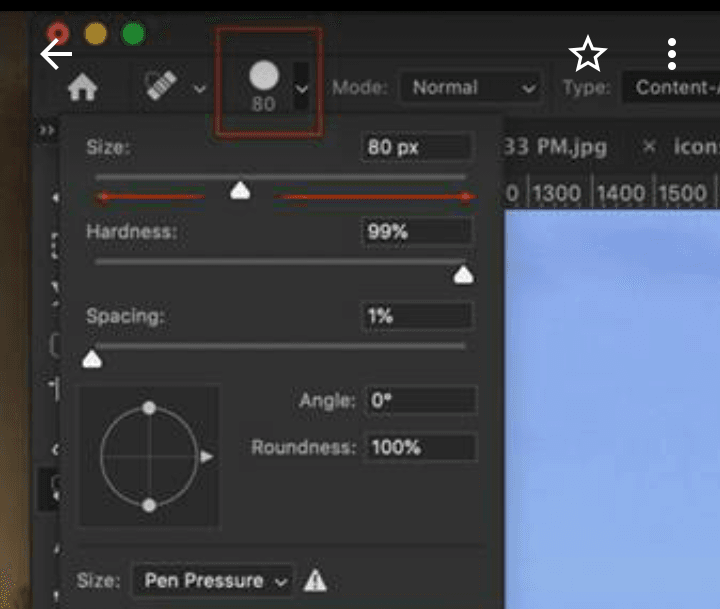
Here, you can first choose the size of the brush, which appears as a small dot on your workspace. You can choose the size of the brush on the options bar. Don't let it be too big. It should be slightly larger than the spot on the image.
You need to click on the fly-out menu to give you the size slider. On the slider, you can move to the right to make it larger or to the left to make it smaller.
Still, on the options bar, you need to select content-aware on the type option.
You also need to change to soft brush on the brush menu. A harder brush will make the changes noticeable.
Step Five: Remove Skin Blemishes

All you need to do is click on the blemish you need to remove, and Photoshop will do its magic. Photoshop removes the blemish and replaces it with smooth skin that will blend in with the rest of the skin.
An example is this woman's forehead with a small pimple.
Here's after clicking on the pimple. As you can see, the pimple is gone.
To get rid of other blemishes in the skin, follow the same procedure, and you will have a photo with a skin free of blemishes.
Once you are done getting rid of all the blemishes, you can now view the before and after. To do this, you will go back to the layers panel and select the eye symbol on the top layer, which you labelled as spot healing.
Step Six: Smooth the Skin
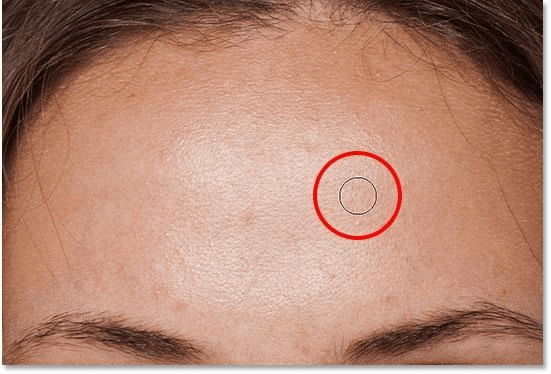
The first step after removing the blemishes from the skin is to duplicate the layer and label it.
Step Seven: Change to Smart Object
The layer you just labeled should now be converted to a smart object. This will ensure that the filters you will apply will become smart filters.
With Smart filters, you can always come back to this layer and adjust anything on the image. You can do this by right-clicking on the layer and choosing the Convert to smart object.
You can also do this by choosing the filter menu and choosing to convert for smart filters.
Step Eight: Apply the High Pass Filter
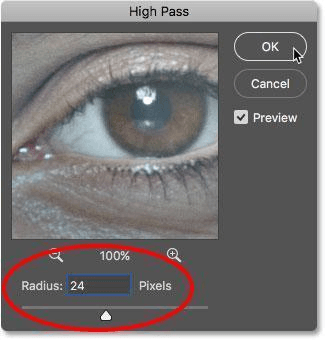
The Radius value
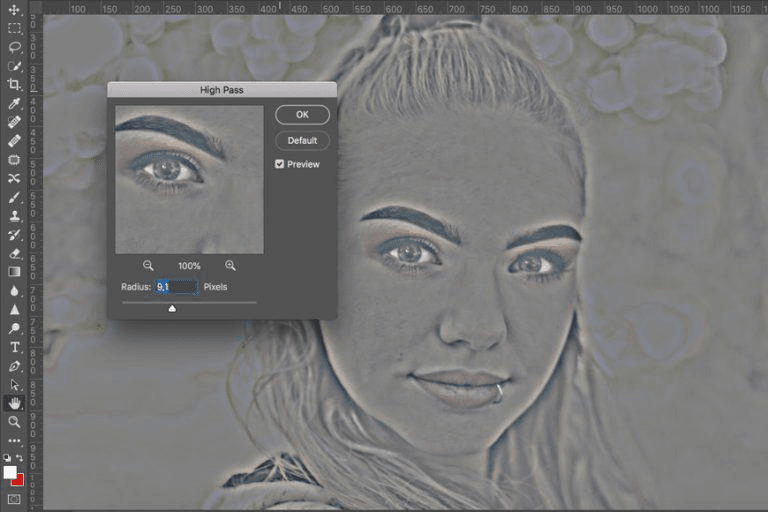
The high pass tool places a neutral Greg layer over your image. If you move the radius value, you will be able to better identify the edges.
The high pass filter detects the edges of the image and also highlights them. The radius option at the bottom of the high-pass dialogue box determines the thickness of the highlight.
A low radius value will only highlight the finest details of the image. For a normal portrait, a 24-pixel radius value will work well. However, if you are working on a low-resolution image, you might want to choose between an 18 or a 12-pixel radius value.
These actual figures will be important for the next step, so ensure that you only choose figures that you can easily divide by 3.
When using this tool to sharpen an image, the radius value should not be too high. However, since we are using it to smooth the skin, the value should be a bit higher.
After you are done using the radius value, click OK, and the dialogue box will now close. Doing this will turn your image grey.
Step Nine: the Gaussian Blur
Now, we need to apply a blur on the High Pass Filter Effect. There are different blur tools to use, but the Gaussian blur is the best regarding smooth skin on an image.
Applying a blur on top of the High Pass filter effect may seem like a lot of work, but it helps to even out the texture of the skin. To choose this blur, go to the filter menu and choose blur. You will see a drop-down list of other types of blur; choose the Gaussian blur.
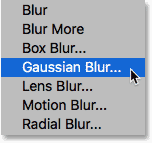
Choosing this blur will open the Gaussian dialogue box. This, too, will have a radius value. Here is where the previous value figures come in. Here, you need to set the radius value to exactly a third of the value you used in the previous step.
So if you used 24, then a third of it will be 8 pixels. Now click OK to remove the dialogue box.
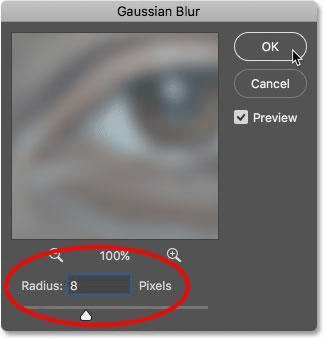
You will notice that after you apply the blur, the High Pass Effect on the image will now look softer and with fewer details. Note that this is still a smart filter, which means you can adjust it later when you want to.
Step Ten: Change to Linear Light Mode
On the layers panel, you will need to change the blend of your latest layer from normal to linear light.
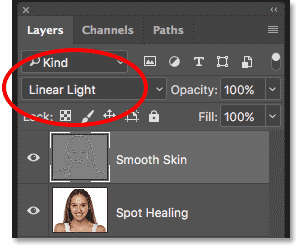
This action blends the High pass effect into your image. The result will be a highly contrasted image. Well, it looks terrible, but it may also look worse in the next step; the final result will be a fine image with smooth skin.
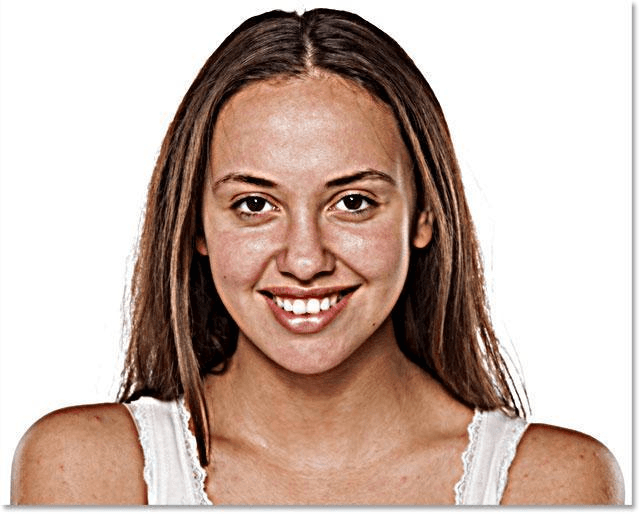
Step Eleven: Invert the Layer
To inver this layer, you need to choose the image menu and select adjustments. From there, click on an invert. The image, after inverting the layer, will now look messy. Here's what it will look like
Step Twelve: Open the Blending Mode
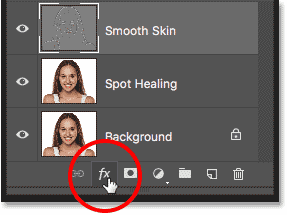
To remove or reduce the halo effect, you need to click on the layer styles icon. You can see this at the bottom part of the layers panel.
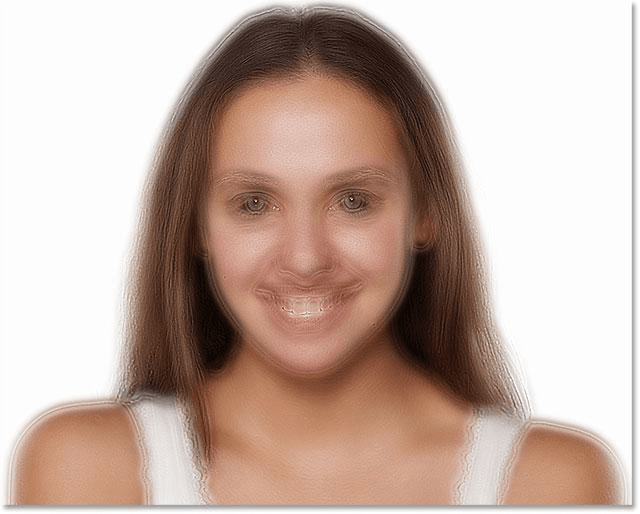
Now, choose the blending options from the drop-down list.
Step Thirteen: Blend If
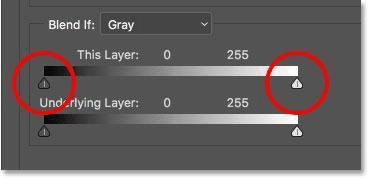
The last step will open a 'blend if' dialogue box and the sliders below it. There are two sliders; 'this layer' and the 'underlying layer'. When smoothing the skin, we will use 'this layer'.
Take note of the sliders below each gradient bar. The sliders will control how your last layer blends with the image beneath it.
The slider on the right will blend in the lighter areas of the image layer, while the left slider blends the lighter areas.
Reduce the lighter halos
You can start by reducing the lighter halos on the image. On Windows, you can press and hold the Alt key, while on Mac, you can press and hold the option key. Doing this tells Photoshop to slit the slider in half so that while you drag the right side, the left slider stays in place.
Now click the slider on the right and drag it towards the left. Check on the image as you drag, and you will now see that the lighter halos are gradually fading off.
Since you want to completely reduce the lighter halos, you should drag the slider all the way to the left so that the lighter halos minimize as much as possible.
After this action, you will notice that the lighter halos are few or are less noticeable. Now, only the darker halos on the image are remaining.
Reduce the Dark Halos
Once again, press the Alt Key on Windows and the option key on Mac. Now click the slighter on the left side and drag it halfway towards the right side.
Drag it all the way to the right to get rid of most of the dark halos on your image. Now click OK to remove the dialogue box.
The two actions will smooth out the whole image and not only the skin. But you only want to have smooth skin, right? This happens in the next step.
Step Fourteen: Add a Layer Mask
You will see a black-filled thumbnail appear beside your third layer.
Step Fifteen: Choose the brush tool and Set it to white
From the toolbar, choose the brush tool.

After choosing the brush tool, you now need to set the brush colour to white. The current colours are the foreground and the background colours in the colour swatches near the end of the toolbar.
On the upper left is the foreground colour. To quickly switch it to white, you can click D on your keyboard.
Step Sixteen: Paint Over the Skin

For best results, you can use a soft-edge brush and start painting. Painting over the skin showcases the smoothing effect.
View the layer mask
To see what you have painted, click and hold the Alt key and the option key on your keyboard. In the layers panel, select the layer mask thumbnail.
Viewing the mask is an excellent way to make sure that you haven't missed any parts. If you have missed out on a certain part, you can simply paint over the mask.
How to Make Skin Smooth Using Imagewith.Ai Tools
Photoshop is a great place to edit your photos in a professional way. For instance, the process we have outlined above is a great way to smooth out your skin realistically.
This means that you only remove temporary blemishes on the skin and leave the other elements of the image. However, with Photoshop, this may be a long process, especially if you have a bunch of other photos to edit. You may also need to pay for a huge subscription to use it.
However, you can still use other methods to make skin smooth, like using an AI photo editor. Al Image Editor is an AI advanced tool that allows you to edit your photos and remove unwanted objects, among other options.
Here are some of the tools that come with Al Image Editor;
Imagewith.Ai ClearOff
If you are not into going through long processes f to get clear photos, then imagewith.Ai clearoff is the tool for you. The tool is used to remove unwanted objects from a photo.
You don't need to go through a long, tedious process. Just upload your photo, tap on tap or draw them tap or draw over the blemish or pimple and imagewith.Ai will do the job for you.
Imagewith.Ai Clearoff is an online tool, so you don't have to download any app on your device to download it. You only need to visit the official Al Image Editor site on your browser, and you can edit your photos.
Al Image Editor also has other photo editing tools, including Imagewith.ai Outcut and Imagewith.ai Overscale. Overscale allows you to improve the image in terms of image quality while Outcut gets rid of unwanted backgrounds.
How to Make Skin Smooth in Photoshop Free - Final Words
Skin blemishes and pimples are a normal occurrence in any photo. Learning some skin retouching Photoshop skills is a good thing since you may come across images with skin that needs smoothing.
Most beginners may ask, how can I edit a picture to smooth skin? Luckily, you don't have to be a professional photo editor to achieve flawless skin on a photo.
Smoothing out the skin on Photoshop is super easy. You just need to follow the step-by-step tutorial to get the best out of Photoshop. However, you can also use the Al Image Editor to do a faster job and get a clear photo using the Imagewith.Ai’s Cleafoff feature.


