Photoshop makes it easy to work with a range of visual image formats. But some of its most powerful features are only truly useful when you zero in on specific parts of your project. To leverage these techniques, you'll need to know how to select an object in Photoshop.
Selection is pretty much what it sounds like — but it has a huge impact on how Photoshop behaves. Here's a comprehensive crash course on what to expect and how to make it work accurately.
What Are Photoshop Selections?
In Photoshop, a selection is a temporarily isolated area or object within an image. You can create selections to apply various editing, retouching, or manipulation tasks to the chosen part.
One good way to think about this is that selections restrict where Photoshop applies changes and edits. Imagine you want to use the paintbrush tool to add some color to your image. If you only select part of the canvas, the paintbrush will only work within that region, no matter where else you drag. The unselected area will remain untouched as long as it's outside the selection zone.
Why Do I Need to Select Objects in Photoshop?
Selecting objects is a great way to work on isolated parts of an image. For instance, you can select an area to fill in with color or go to town with features like the Remove tool without worrying whether you'll mess up other sections.
Selections also let you isolate objects. For instance, if you had an image of a crowd of people, you might select just one individual and cut them from the shot.
Although working with layers can provide some of the same features, you won't always get projects that come with nicely separated objects. In most cases, you'll have to split the image into its individual elements yourself, and using selections is the easiest route to do so.
Key Things to Know About Working With Photoshop Selections
Selections operate differently depending on the circumstances and tools you're using. Take the following fundamental points to heart!
There are different selection tools for different uses.
Photoshop includes a range of selection tools — but they're not quite interchangeable. Each tool has specific uses and helps you create selections with varying degrees of precision:
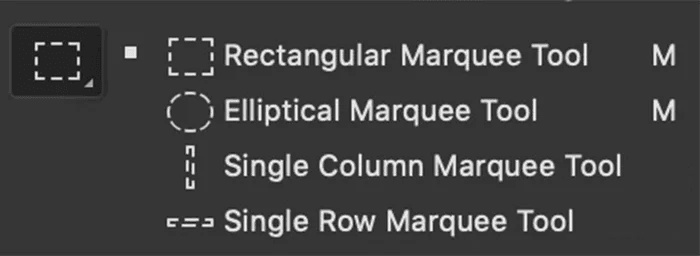
- Marquee Tools: The Marquee Tools let you make rectangular or elliptical selections in your image. They're suitable for basic shapes and cropping.
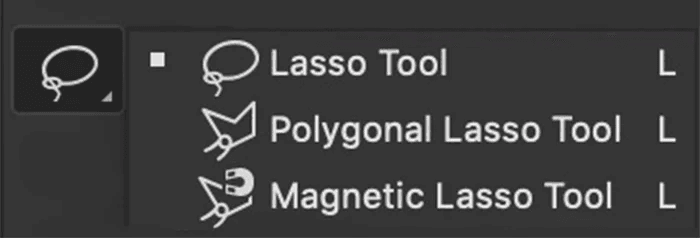
- Lasso Tools: With the Lasso Tools, you can draw selections by hand. The Lasso option gives you total freehand control, while the Polygonal Lasso restricts you to creating straight lines. The Magnetic Lasso tool tries to snap to color boundary edges to create more complex shapes and trace around objects.
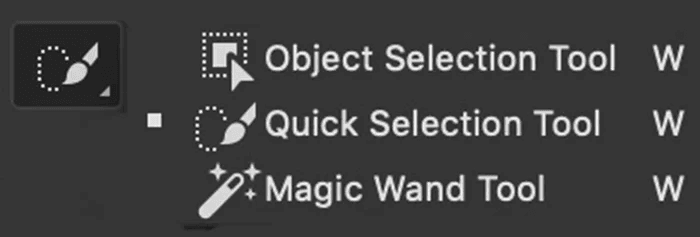
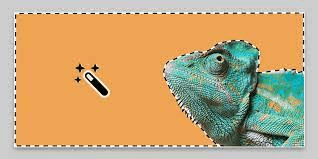
- Magic Wand Tool: The Magic Wand selects areas of similar color and tone. This makes it easy to pick out large, contiguous regions in your image with a single click.
- Wand Tool: The Wand Tool is a simplified version of the Magic Wand. It's ideal for making quick selections based on color and tone.
- Quick Selection Tool: This tool helps you quickly create a selection using a brush to paint out the area. Like the Magic Wand, this tool tries to follow edges based on color transitions.
- Pen Tool: You can use the Pen Tool to create precise, custom paths and selections. The pen lets you lay down points and adjust their (Bezier) curve handles, making it an essential choice for outlining intricate objects, such as people.
- Select Subject: This automatic selection tool identifies and selects the main subject in your image. It streamlines the isolation process, letting you zero in on things like people and animals with a single click. There are also automatic tools for selecting the sky or an in-focus area of a photograph.
- Color Range: This tool selects areas based on specific color ranges. You can use it to target and adjust particular colors in your image, such as changing the hue of a backdrop or piece of clothing.
- Object Selection Tool: This tool is designed to automatically select objects or subjects in your image. It's a nice option for isolating elements in one click.
You can see the pixels you've selected onscreen.
When you create a selection, Photoshop lets you know by highlighting the area. These pixels are enclosed by a "marching ants" style border.
You can modify existing selections.
There are various ways to adjust selections. This is often essential when working with complex shapes and tasks: It's not always easy to select the desired area completely on the first go!
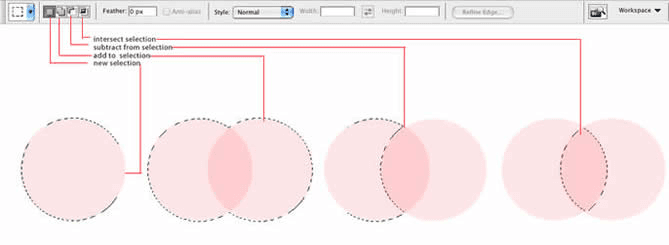
One way to cope involves choosing different selection modes:
- Default Mode: In default mode, any selection you make will cancel old selections, and start over from a clean slate. You can go back to a previous selection using the Undo history, however.
- Add to Selection Mode: This mode will keep the old selection when you make a new one, adding the newly selected areas to the old.
- Subtract From Selection Mode: This mode lets you keep the selection while deselecting only certain areas.
- Intersect/Overlap With Selection Mode: In intersection mode, any new selections you make will only be selected if they overlap/coincide with previous selections. This mode is helpful for refining selections without going outside your original boundary or having to subtract large areas by hand.

There are also other ways to modify your selection, like the "Expand" and "Contract" tools under the Select > Modify menu. Once you choose either, you'll see an "Expand By" or "Contract By" dialog. If you enter a number, the selection will expand (grow) or contract (shrink) by that number of pixels. Think of it like a puddle of water spreading outward or receding — the border will shift uniformly all around the selection until it hits the edge of the image.
Other options include the Select > Grow menu item. This will grow the selection area to include adjacent pixels within a specified color tolerance. To set your preferred tolerance, select the Magic Wand tool, and look for the Tolerance option at the top of the screen.
You can also use Select > Similar to grow the selection, but the new pixels don't have to be next to the first area. Using this modifier will include any pixels within the color tolerance, no matter where they are in the image.
Finally, there's the Select > Inverse menu item. This flips the script by switching which areas are selected and which aren't.
Inversion really comes in handy when you want to save yourself some effort. You can select a simple part of an image and then invert to capture everything else without having to do as much work. This is a common tactic for removing backgrounds.
Selections can — and often should — have soft edges.
Feathering is the softening of the edges of a selection with blurry transitions. It allows for smoother boundaries between the selected and unselected areas, but it can mean you lose detail at the edges.
Anti-aliasing eliminates jagged edges around a selection, getting rid of those unnatural zig zags. It's pretty handy when you're copying, cutting, and pasting elements.
You can use selections to create masks.
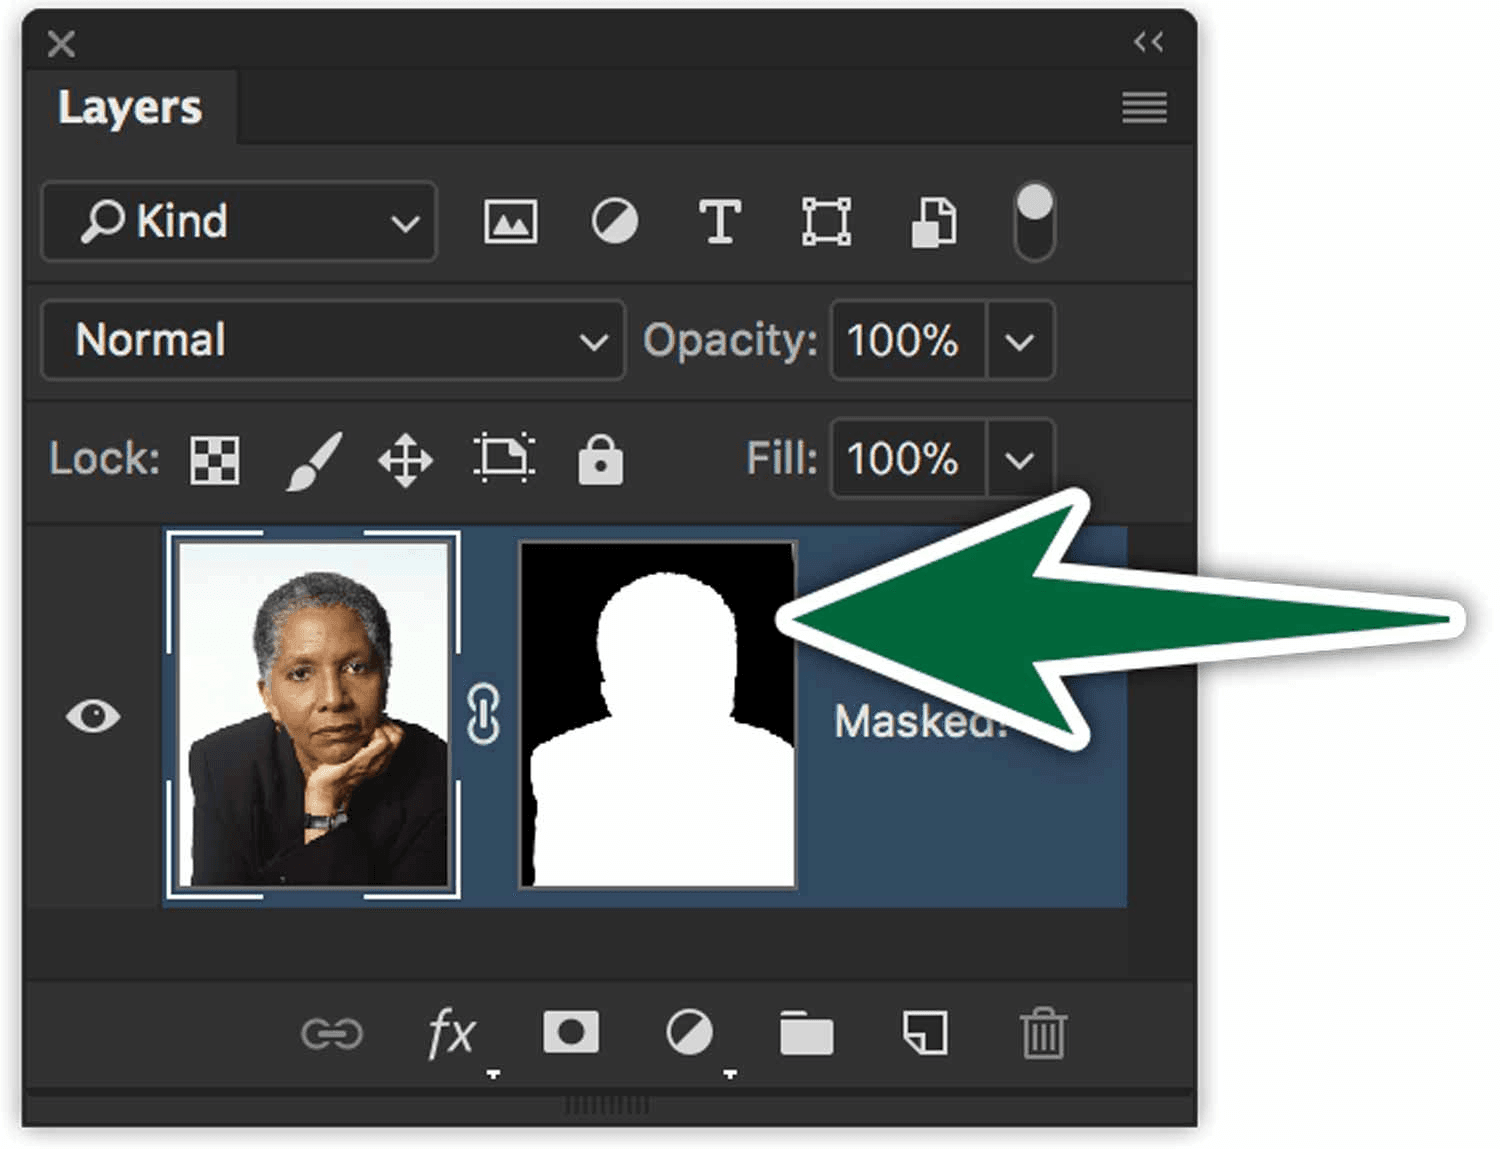
A Photoshop layer mask is a powerful and non-destructive editing feature. It lets you control the visibility of specific parts of a layer.
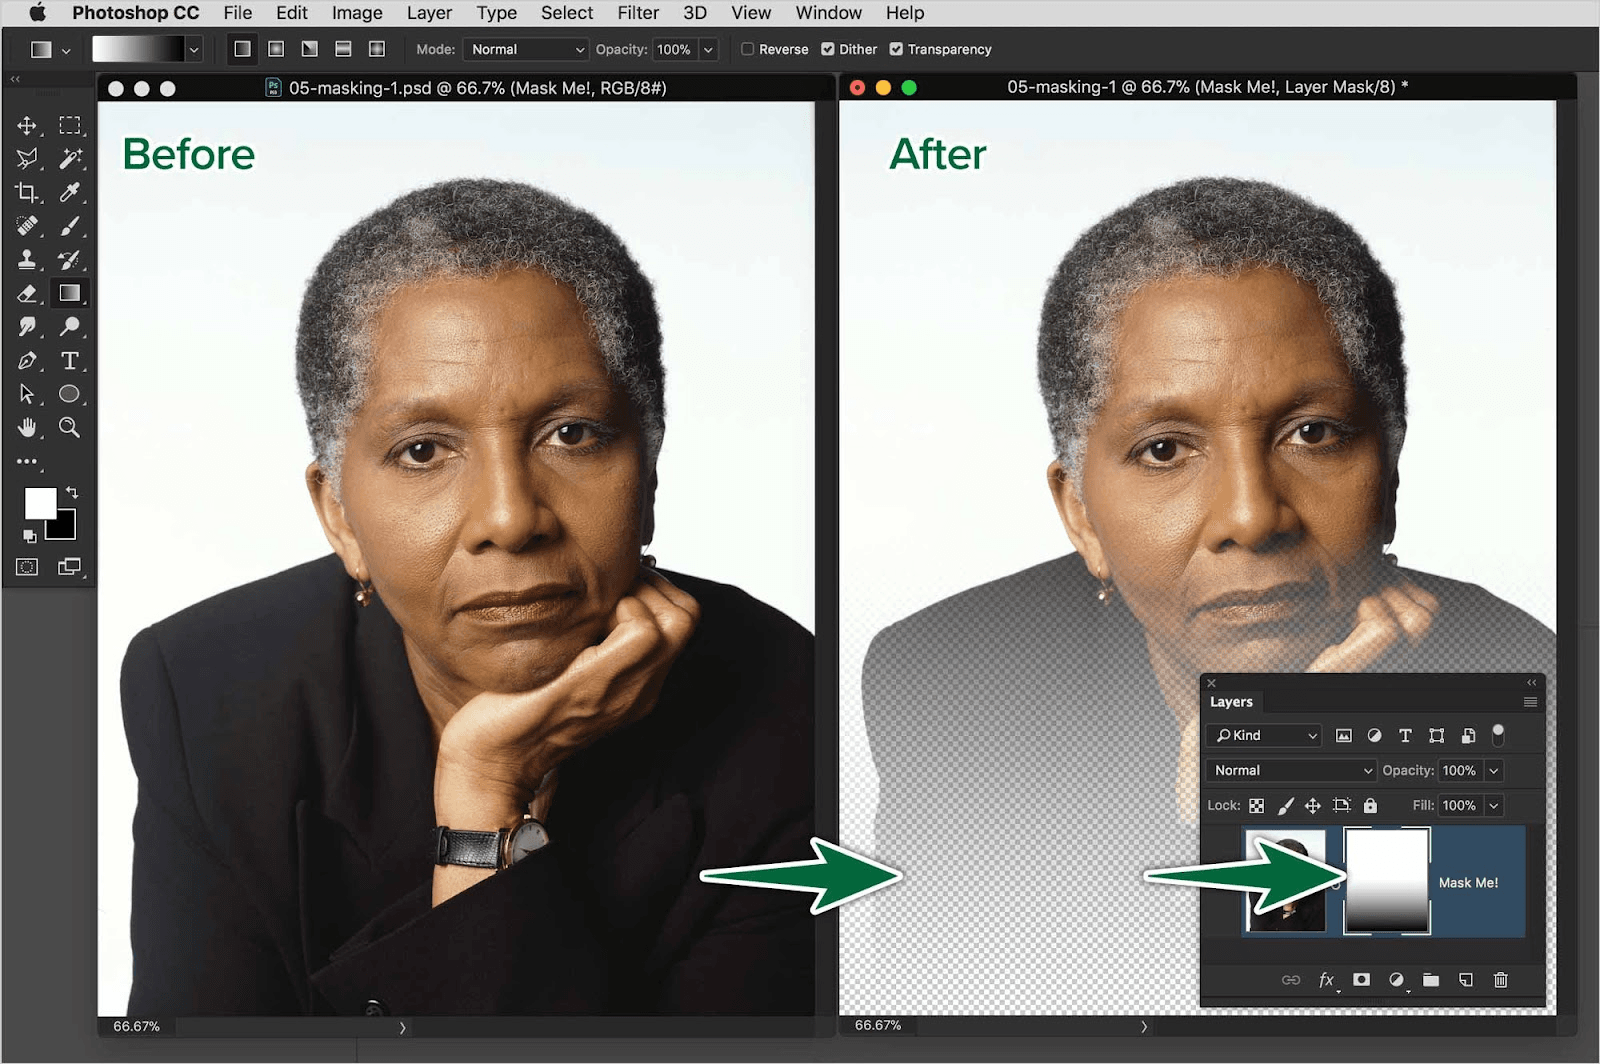
A mask essentially works like an invisibility barrier between the masked layer and what you can see. White areas on the layer mask reveal the corresponding parts of the layer. Black areas on the mask hide those parts of the layer.
Masking lets you blend, combine, or edit images seamlessly. Since masks don't alter the original content, they're very helpful for advanced photo editing and compositing.
You can define a mask with most of the selection tools we've described. After making a selection, head to the layers panel to create a new mask layer. Fill your selection with white or black to control what shows up. You can even do this using the paintbrush or gradient fill tools to produce a slick transition effect.
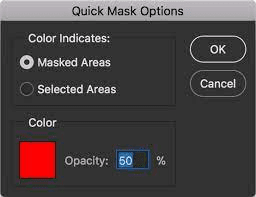
There's also a Quick Mask mode. It converts a selection to a temporary mask that's just for editing. You can modify the selection using your preferred painting tools, and you'll see a colored overlay indicating what you're doing.
You can change the color of the mask and whether it indicates the masked or selected areas. The mask will revert back to a normal selection when you cancel Quick Mask mode.
Pro Tip: If you’re having trouble with selecting and masking objects, try the "Select and Mask" or “Refine Edges” features. They’re particularly useful when working with complex subjects or objects, like hair.
What Can I Select in Photoshop?
You can select anything on the canvas. You just need to be sure you use the right tools, such as working with the wand to select colors or the subject selection tool to select people.
One thing to note is that your selection areas can be separate, or discontinuous. For instance, you might only need to select the top and bottom of an image but want to leave the middle out.
How to Select Objects in Photoshop Accurately
One of the biggest problems with selections is that you're playing with extremely fine details. Although it's nice to have a lot of control, editing images at the per-pixel level leaves a lot of room for error.
This issue can crop up in a few different ways. For instance, if you select a large area without zooming in to see the nuances before applying a color fill, the edge regions might look grainy or jagged. Since selections also serve as the starting point for other edits, messing up at this early stage can impact the rest of your work.
Fortunately, people have been using Photoshop selections for long enough to figure them out. Here are a few good ideas to keep in mind to improve your selection accuracy:
Learn Which Selection Tools Fit Which Jobs
Choosing the selection tool that best suits your needs can be tough, but it's essential. For instance, you should usually stick to the Marquee or Lasso tools for simple shapes and the Quick Selection or Pen tools for more complex subjects.
While options like the Magic Wand are super convenient, they don’t always work with all images. If you choose these tools, be sure your project has a large area with a solid or similar color!
Try to avoid the impulse to just go with your favorite option. Learn to be flexible so you can adapt to each situation and task.
Zoom In and Out
Zooming in on your image makes it far easier to work on fine details. It's a critical step when you're trying to create or adjust precise selections, especially for objects with intricate edges.
Learn to zoom in and out with the keyboard while you're using the mouse to select. Switching between close-up and big-picture viewpoints is the only way to go for cohesive, smooth edits.
Don't Try to Do It All at Once (Use Selection Modes!)
It's not always easy — or possible — to select everything you want to grab in one move. Don't be afraid to highlight a large area and then narrow it down gradually. This method is a fantastic time-saver.
Experiment With the Feather Value
When working with soft transitions, you'll want to feather or anti-alias the edges of your selections to make them blend more seamlessly. But the same settings aren't appropriate for all jobs, even within the same image. Before making a selection, be sure to set an appropriate feather value.
Pro Tip: The feather value also applies in Add to Selection and Subtract From Selection modes. But Photoshop won't remember your history for these settings. You might want to take notes so that you can maintain consistency when modifying previous selections.
Use Guides and Grids
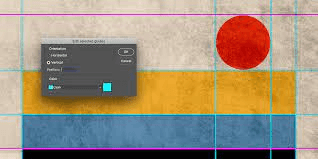
Turn on guides or grids to align your selections with the image's key elements. You can create guides pretty easily by clicking on the rulers on the side of the page and dragging the mouse onto the main workspace. This isn't always necessary, but it can help you maintain accuracy when you've got a lot going on.
Practice With the Pen Tool
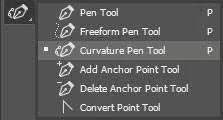
The Pen tool's bezier curves can take some getting used to. Practice playing around with this feature before putting it into action for real. Also, remember that not all shapes naturally follow precise mathematical curves — you may need to modify your Pen tool selections later.
Save Your Selections
One of the worst feelings in the world is when you create a complicated selection only to absentmindedly close the app and lose the last few hours of your life! Photoshop doesn't save selections between sessions, and you only get so many undo operations.
Want to save yourself a ton of painful heartbreak? Start by saving your selections as channels, paths, or layer masks for later use. That way, you'll be able to reselect them later with a single click.
Be Patient
Pace yourself when making selections. It can be super frustrating, however, rushing is not the answer! This is especially true for challenging subjects. You'll improve — it just takes time.
Conclusion
Photoshop selections are crucial for tasks like cropping, retouching, compositing, and various other image manipulations. They help you maintain precision and control in your editing process. If you're worried about getting things just perfect, then using selections can make your life a lot easier.
Want more great tips on photo and image editing? Stay tuned to the ImageWith.ai blog.


